So you have some products that are not directly compatible with Apple HomeKit? In this post, we will discuss how to integrate IFTTT with HomeKit via a free server called HomeBridge and have the control function in your home app.
Before I would start with the tutorial, there is something you need to know. We are going to use third-party services in this process and therefore, the will be a slight delay in the response time. It is roughly a couple of seconds but not too much annoying.
Here's what we cover:
What You Need for This Integration
- A computer (any operating system) or a Raspberry Pi
- IFTTT account (free)
You need a computer of any operating system to run the HomeBridge server. One thing to note is that the computer has to stay running to keep the integration working. It is going to be the mediator between HomeKit and IFTTT.
If you think keeping a computer running for this integration is too much, you could get a cheap Raspberry Pi. We recommend CanaKit Raspberry Pi 4 Starter Kit with 4GB RAM. This is definitely not the cheapest but it includes the necessary accessories in one package including a nice case featuring a cooling fan.
Lastly and also very obvious, you will need an IFTTT account. It can be a free one as long as you have not reached the applets’ limit.
Note: Make sure to check the device you are trying to control from the home app supports IFTTT. If that device does not support IFTTT, this tutorial will not work.
Create Homekit Webhooks Applet on IFTTT
- Login to your IFTTT account.
- Click “Create” button and then “Add” next to IF This.
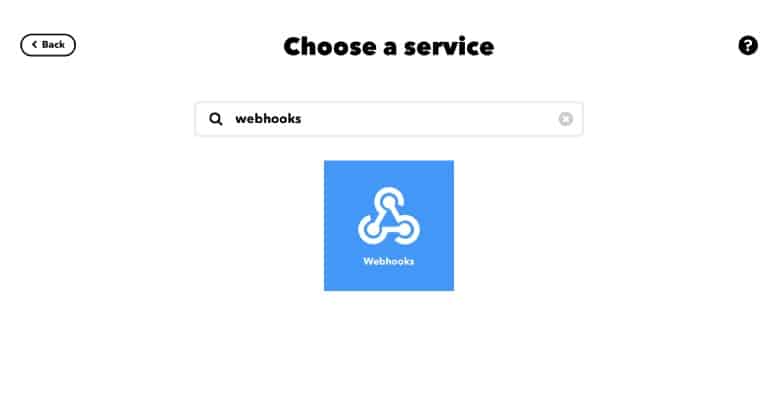
- Search for “Webhooks” and click. On the next screen, click “Receive a web request”.
- It will show you a button named “Connect”. Click it and give this trigger a name. I am going to call this “bedroom_light_on”.
- Choose the destination action. It is the device that you want to control. In my case, I want to turn on “BedroomLight” on. Make sure you already have your device connected to IFTTT.
- Repeat the steps 1-5 for creating a duplicate trigger but this time we are going to name it “bedroom_light_off” and the destination action should be “BedroomLight” off.
- Lastly, you need your webhooks key for later steps. You can find your key by going to “Explore” > Search “Webhooks” > Documentation. Keep it somewhere as we are going to need this.
Install HomeBridge
The steps for installation vary slightly depending on which platform you are on. You can of course go to the main HomeBridge website and there will find the steps for your particular operating system.
It is a three-step process.
- Install NodeJS
- Install HomeBridge and HomeBridge UI
- Install HomeBridge IFTTT Plugin
Note: This tutorial does not cover installation on Raspberry Pi. If you want to install it on a Raspberry Pi, there is a nice documentation on GitHub.
Installing NodeJS
If you never installed NodeJS in your computer before, you can go to NodeJS’s Website and download the installer corresponding to your OS.
Once you have done this or you have already installed it in the past, run the following command in “Terminal” (mac) or “Command Prompt” (Windows) to verify the installation:
node -v
If you see a version number, you have installed NodeJS correctly. But if you see something like command not found, it means that NodeJS is not installed properly.
Installing HomeBridge and HomeBridge UI
Now we are going to install HomeBridge and its interface using the following command in your terminal:
Mac:
sudo npm install -g homebridge homebridge-config-ui-x
Windows:
npm install -g homebridge homebridge-config-ui-x
In addition to that, if you want to launch HomeBridge automatically in the background when you start your computer, you can run the following command to add it to your services:
Mac:
sudo hb-service install
Windows:
hb-service install
Note: On Mac, after running every command using sudo, you might be asked to enter your password. This password is your computer’s user password and it is being prompted to verify your system writing permission.
Installing HomeBridge IFTTT Plugin
The following command would install the plugin in your HomeBridge server:
Mac:
sudo npm install -g homebridge-ifttt
Windows:
npm install -g homebridge-ifttt
Connect HomeBridge to IFTTT
You are all set with the installation. You can now access HomeBridge using their UI. On any web browser, go to the following page: http://localhost:8581
The default username is admin and the password is also admin.
There should a tab named “Config”. That is where you want to go next for finishing up the integration.
You would see a file with some code in JSON format. All you have to do is to copy the following code and add this inside the platforms array:
        {
            "platform" : "IFTTT",
            "name" : "IFTTT",
            "makerkey" : "XXXXXXXXXXXXXXXXXXXXXXXXXXXXXXXXXXXXXXXXXXX",
            "accessories" : [
                {
                "name" : "IFTTT",
                "buttons" : [
                    {
                        "caption" : "BedroomLight",
                        "triggerOn" : "bedroom_light_on",
                        "triggerOff" : "bedroom_light_off"
                        }
                    ]
                }
            ]
        }
In this code, the makerkey is your IFTTT key that you copied in Step 7. Caption is the name of your device that you want to control and triggerOn and triggerOff are the triggers you named in Step 5 and Step 6.
Here is what a full config file would look like and I have also tried to show how you can add multiple actions in the buttons array:
{
    "bridge": {
      "name": "Homebridge",
      "username": "XX:XX:XX:XX:XX:XX",
      "manufacturer": "homebridge.io",
      "model": "homebridge",
      "port": 12345,
      "pin": "123-45-678"
    },

    "description": "This is an example configuration file for connecting HomeBridge to IFTTT.",
    "platforms": [
        {
            "platform" : "IFTTT",
            "name" : "IFTTT",
            "makerkey" : "XXXXXXXXXXXXXXXXXXXXXXXXXXXXXXXXXXXXXXXXXXX",
            "accessories" : [
                {
                "name" : "IFTTT",
                "buttons" : [
                    {
                        "caption" : "BedroomLight",
                        "triggerOn" : "bedroom_light_on",
                        "triggerOff" : "bedroom_light_off"
                        },
                    {
                        "caption" : "KitchenLight",
                        "triggerOn" : "kitchen_light_on",
                        "triggerOff" : "kitchen_light_off"
                        }
                    ]
                }
            ]
        }
    ]
}
If you have followed this far, well done! You have everything in place to make this thing work. Now restart the HomeBridge server and it should start working right away. You can restart HomeBridge from the top right corner of your HomeBridge UI.
Add HomeBridge to Home App
The very last thing in the to-do list is that you have to add HomeBridge to your Home app. Once your HomeBridge server is running, it is as easy as just adding another accessory.
- Open Home app and tap “+” > “Add accessory”.
- Tap on “Don’t Have a Code or Can’t Scan?”
- Select HomeBridge from “Nearby Accessories”.
- If it asks for a pin, you can find it on HomeBridge UI’s config tab. It is usually an 8-digit number.
FAQ
Does IFTTT work with HomeKit?
IFTTT works wonderfully with HomeKit if the device you are controlling is HomeKit compatible. You can even create a Siri Shortcut and ask Siri to do that via voice commands.
Can you use IFTTT to control devices that are not compatible with HomeKit?
You can control HomeKit non-compatible devices using IFTTT but you will need a mediator like HomeBridge to make the connection. In any case, the HomeKit non-compatible device should at least support IFTTT.
Conclusion: Is This Integration via HomeBridge Worth the Effort?
The process we discussed here is surely no the easiest. If you are somewhat familiar with programming, it would not take you any time. However, if you seem to be very new around programming, small mistakes in this process could be a big headache.
The best advice I could give you is that follow the steps carefully and if you are totally new to programming, get some help from a friend. Once everything is running the way you wanted, you will feel the effort was worth it.